The humble yet mighty knot-tying tool, an age-old skill enhancer, emerges as a champion, turning complex tangles into neat, secure bundles of efficiency. This article is not just about learning to tie knots; it’s an adventure into the ingenious world of knot-tying tools, a journey that promises to be as enlightening for the seasoned sailor as it is for the curious novice.
Fasten your ropes and prepare to unravel the secrets of these tools!
Types of Knot-Tying Tools
| Type of Knot Tying Tool | Description |
|---|---|
| Fishing Knot Tools | Designed for tying strong, reliable knots in fishing lines. Ideal for knots like the improved clinch knot or the Palomar knot. |
| Rope Knot Tools | Versatile tools used for a range of applications including camping and boating. Suitable for various rope thicknesses and types. |
| Decorative Knot Tools | Specialized tools for creating decorative knots, often used in crafts, jewelry making, and ornamental projects. |
| Boating Knot Tools | Tools specifically tailored for boating applications, focusing on knots that ensure safety and reliability in marine environments. |
| Climbing Knot Tools | Engineered for climbers, these tools aid in tying knots crucial for safety in climbing activities, adaptable to various rope types. |
| Survival Knot Tools | Essential for outdoor survival situations, these tools assist in quickly tying knots for shelters, rescues, or securing equipment. |
Mechanics
To effectively use a knot-tying tool, one must first grasp its basic mechanics. Most knot-tying tools have a similar basic structure: a handle for gripping, a channel or groove for the line or rope, and often a mechanism for tightening or securing the knot.
Some also have additional features like cutters or hooks for specific types of knots:
- Handle for Gripping: The handle is the part of the tool that you hold during the knot-tying process. It’s ergonomically designed for comfort and ensures a secure grip. This is crucial, as a steady hand is essential for precision in knot tying. The handle’s design can vary from simple, straight forms to more ergonomically contoured shapes, catering to different preferences and uses.
- Channel or Groove for the Line or Rope: This is where the magic happens. The channel or groove is the pathway through which the line or rope is threaded or laid. It guides the rope in the correct path to form the knot. In some tools, this groove is adjustable to accommodate different thicknesses of rope or line, which is especially useful if you are working with a variety of materials.
- Mechanism for Tightening or Securing the Knot: Perhaps the most critical component, this mechanism varies from tool to tool, depending on the type of knot it is designed to tie. It could be a simple lever or a more complex system involving multiple moving parts. The purpose of this mechanism is to help tighten the knot without putting undue strain on the line or rope, ensuring a secure and reliable knot.
- Additional Features: Many knot-tying tools go beyond these basic components. Some include built-in cutters, which are incredibly useful for trimming excess lines or ropes after the knot is tied. Others might have hooks or spikes to assist with specific types of knots, such as those used in fishing. These additional features add versatility to the tool, making it a more valuable asset in various scenarios.
Step-by-Step Guide
Using a knot-tying tool involves a series of steps, slightly varying based on the type of knot you intend to tie. However, there are common steps applicable to most tools and knots.
- Preparing the Line or Rope: Before using the tool, it’s necessary to prepare the line or rope. This might involve cutting it to the desired length and ensuring that the end is free of frays or tangles.
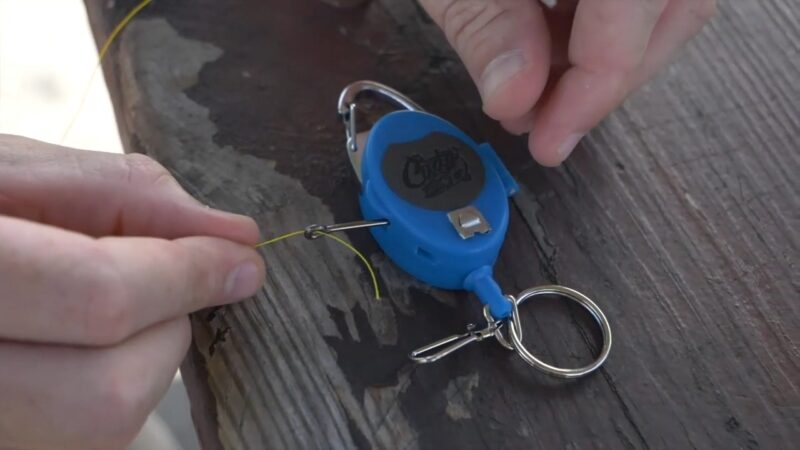
- Inserting the Line: The next step is to insert the line into the tool. This is usually done by threading the line through the designated channel or groove in the tool.
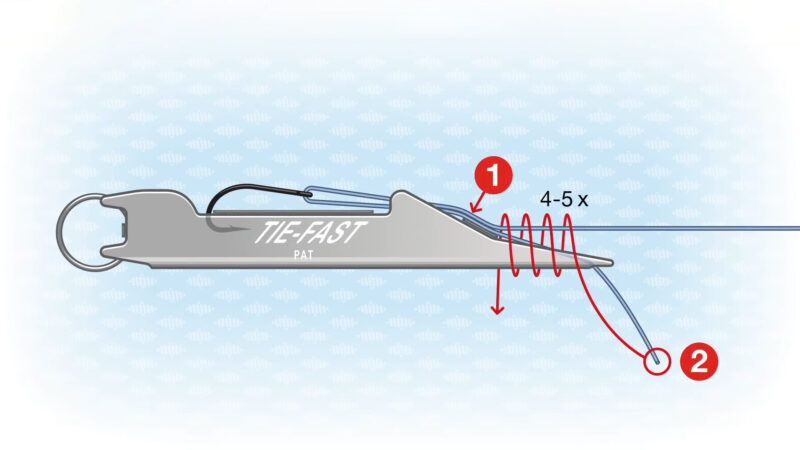
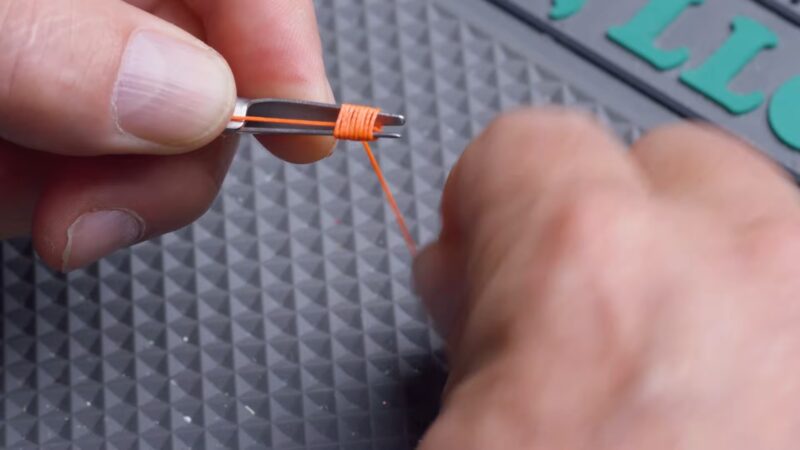
- Forming the Knot: Depending on the type of knot, this step can vary. For many fishing knots, for instance, this involves wrapping the line around a specific part of the tool or creating loops in a certain pattern.
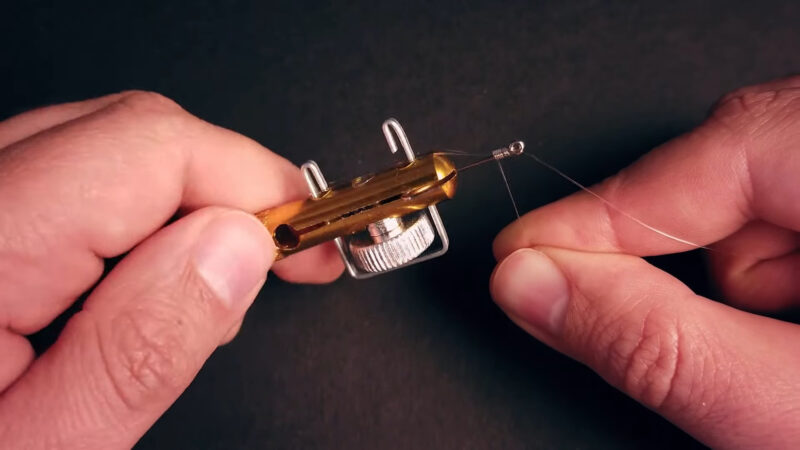
- Tightening the Knot: After the knot is formed, the tool often provides a mechanism to tighten it. This is a crucial step as it ensures the strength and reliability of the knot.
- Finalizing the Knot: Some knots might require additional steps like threading a tag end through a loop. The tool might have features to assist in these final steps.
- Securing and Trimming: Finally, the knot is secured and any excess line or rope is trimmed off. Many knot-tying tools come with built-in cutters for this purpose.
Common Knots Made Easier

Several knots can be tied more easily with the aid of a knot-tying tool. In fishing, knots like the improved clinch knot, Palomar knot, and the blood knot are common.
For general purposes or camping, the bowline, square knot, and sheet bend are knots that can be efficiently tied using these tools. Each of these knots serves a specific purpose and the tool can ensure they are tied correctly and securely.
| Knot Name | Step-by-Step Instructions |
|---|---|
| Improved Clinch Knot | 1. Pass the line through the eye of the hook. 2. Wrap the end around the standing line 5-7 times. 3. Thread the end back through the initial loop and the big loop formed. 4. Wet the knot and pull tight. |
| Palomar Knot | 1. Double 6 inches of line and pass the loop through the hook’s eye. 2. Tie a simple overhand knot with the loop. 3. Pull the loop down and pass it completely over the hook. 4. Tighten the knot and trim the excess. |
| Blood Knot | 1. Overlap the ends of two lines. 2. Twist one around the other 5 times and bring it back through the middle. 3. Repeat with the other line. 4. Pull both lines to tighten. |
| Bowline | 1. Form a small loop leaving enough rope for the desired loop size. 2. Pass the end of the rope up through the loop. 3. Wrap the end around the standing line and back down through the loop. 4. Pull tight to secure. |
| Square Knot | 1. Lay the ends of two ropes parallel. 2. Take the right end over and under the left end. 3. Repeat with the left end. 4. Pull both ends to tighten the knot. |
| Sheet Bend | 1. Create a bight with one rope. 2. Pass the end of the other rope through the bight. 3. Wrap it around and behind the bight. 4. Tuck it under itself and pull it tight. |
Tips and Tricks
Using a knot tying tool efficiently requires practice and some handy tips can be beneficial.
- Always ensure the tool is in good condition and clean. Dirt or damage can impede its functionality.
- Practice with different types and thicknesses of lines or ropes. The tool might behave differently with varied materials.
- While the tool aids in tying knots, understanding the knot structure itself is beneficial for ensuring it is tied correctly.
- In scenarios like fishing, where speed is critical, practicing with the tool to increase your speed can be very advantageous.
FAQs
Can knot-tying tools be used for all types of ropes and lines, including those with larger diameters?
Knot-tying tools are designed to work with a range of rope and line diameters. Their effectiveness can vary depending on the tool’s design and the thickness of the rope or line.
Are there knot-tying tools suitable for children or beginners to learn knot tying?
Yes, there are knot-tying tools designed with simplicity and ease of use in mind, making them suitable for children or beginners.
How durable are knot-tying tools, and do they require maintenance?
The durability of knot-tying tools depends on the materials they are made from. Tools made from high-quality plastics or metals tend to be more durable.
Can knot-tying tools be used in survival or emergency situations?
Knot-tying tools can be very useful in survival or emergency situations, especially when reliable knots are needed quickly or under stress.
Are there any environmental considerations to keep in mind when using and disposing of knot-tying tools?
When using knot-tying tools, especially in outdoor environments like camping, fishing, or hiking, it’s important to ensure they do not harm the environment. Avoid leaving any tool parts or cut lines behind.
How can I improve my efficiency when using a knot-tying tool?
To improve efficiency, start by practicing with your knot-tying tool regularly. Familiarize yourself with its mechanism and the specific steps for each type of knot you intend to tie. Watching instructional videos or attending workshops can also be helpful.
Final Words
As we tie up our exploration of knot-tying tools, it’s clear that these small but mighty devices are more than just accessories; they are the unsung heroes in the world of knots. Whether you’re a skilled angler, a camping enthusiast, or someone looking to simplify daily tasks, these tools stand ready to transform your knot-tying experience.
If you appreciate this kind of content and are eager to discover more, don’t hesitate to follow our page for regular updates and insights.